The Best Lighting For Indoor Photography
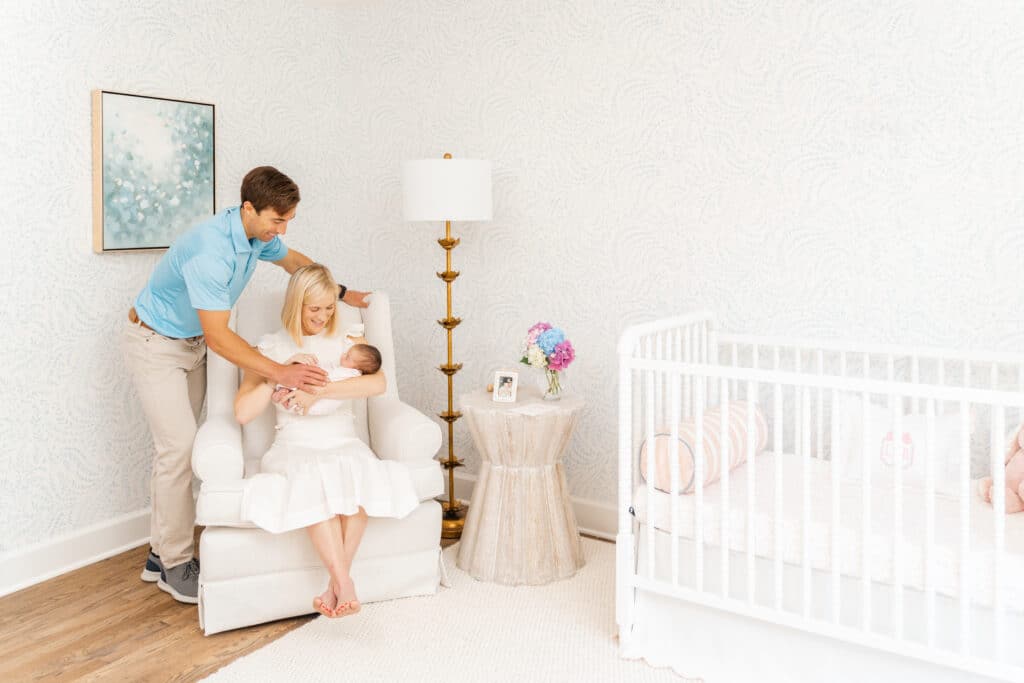
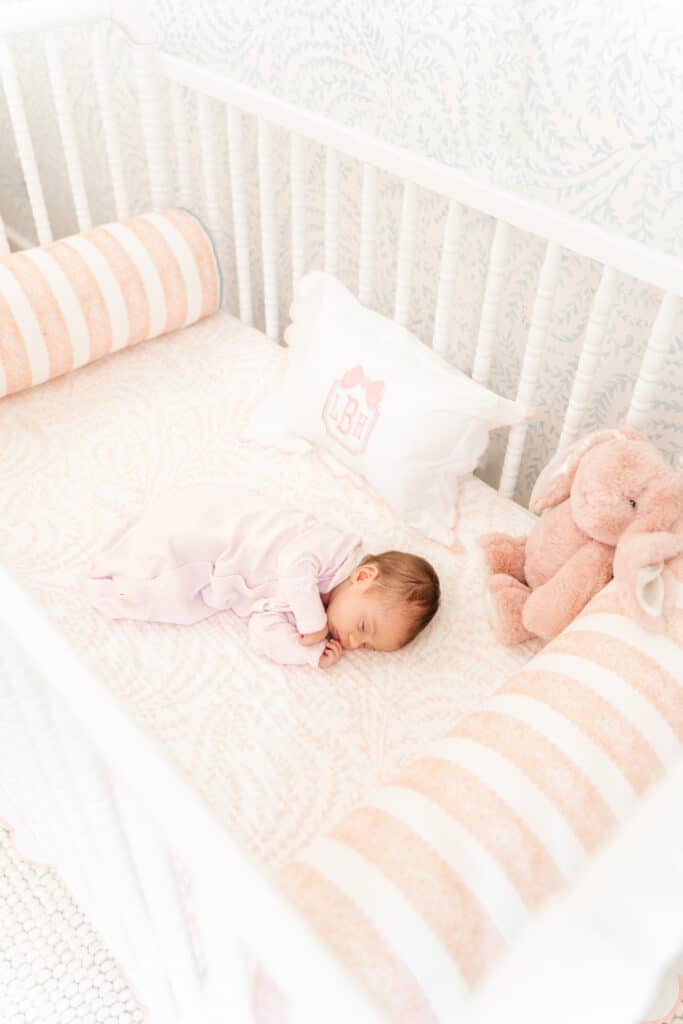
Wondering about the best lighting for indoor photography? In this post I will share my approach as a family and newborn photographer who provides lots of in-home lifestyle sessions throughout the year. However, these techniques can also be applied to other indoor settings for general lifestyle and branding sessions.
TL/DR: My Recommendations for The Best Lighting for Indoor Photography
When seeking the best lighting for indoor photography, seek out natural light by sticking close windows. Avoid artificial lights, which can cause unnatural colors, by turning off lamps and overhead fixtures. In low light situations when window lighting is not bright enough, consider using a flash for supplemental light.
My Goal When Assessing Lighting for Indoor Photography:
Consistency is a big goal of mine whenever I approach any session. I want my clients to receive images that meet their expectations; images that are in keeping with the rest of my portfolio including my outdoor work. Indoor photography sessions often provided the added challenge of low light conditions. Therefore, the lighting strategies you use outside in natural light, don’t always transfer perfectly to indoor sessions.
Buckle up. I evidently have a lot to say on the matter!


A Brief Summary on My Thoughts on The Best Lighting For Indoor Photography
In case you’re looking for a quick answer to the question, “What is the best lighting for indoor photography?” read below:
This post contains affiliate links. This means this website may receive compensation if a purchase is made through the link at no extra cost to you.
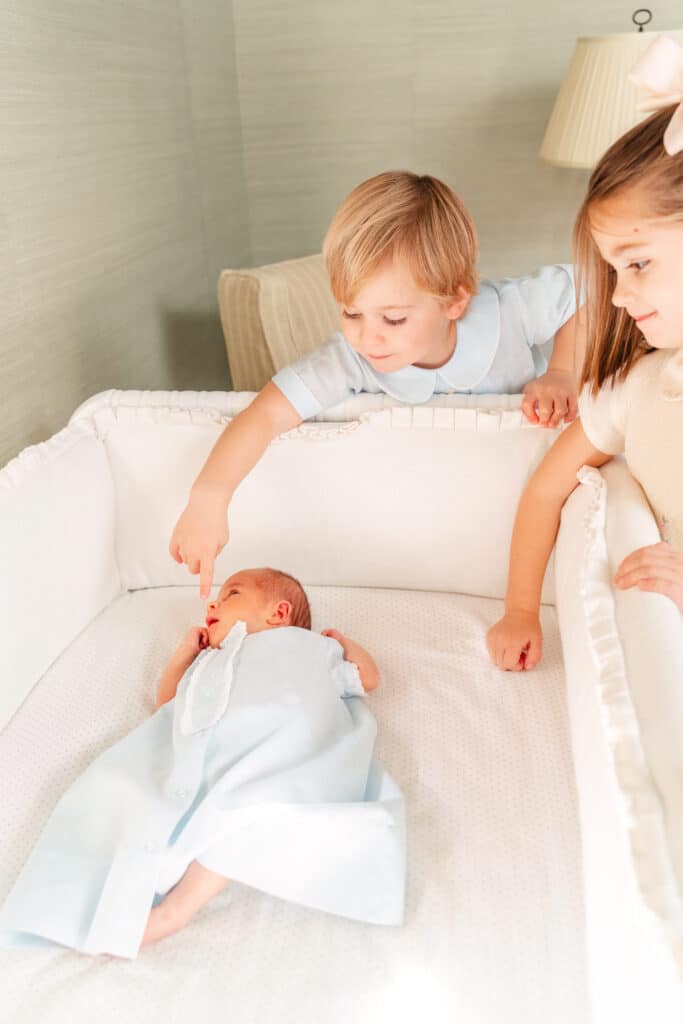
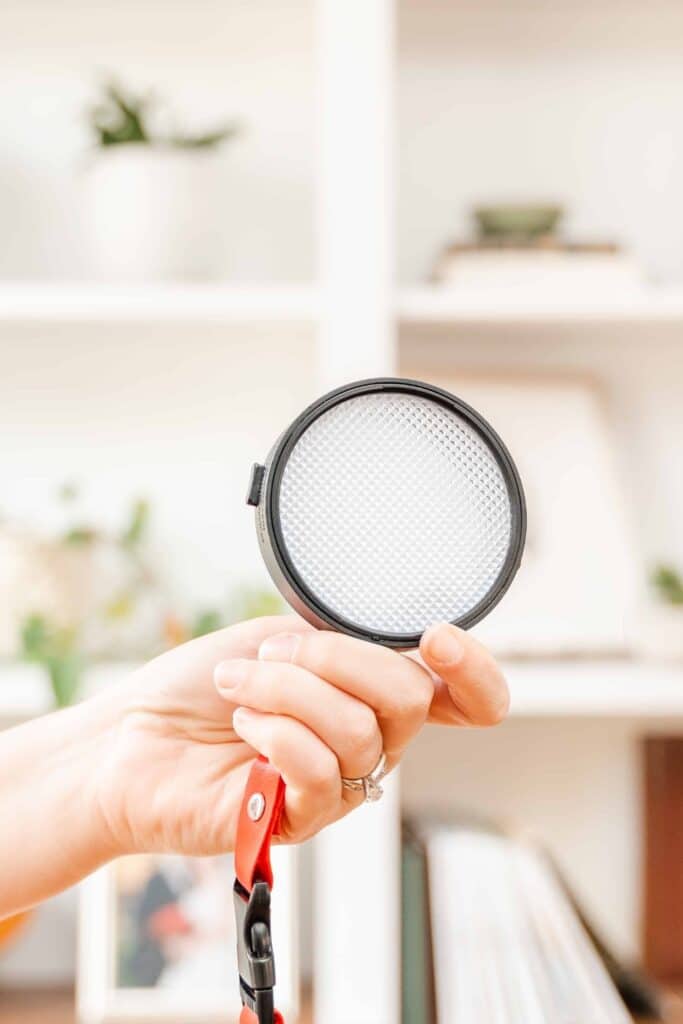
- Flash Photography: My personal preference is to create my own light using flash! I particularly like speed lights which are battery operated, portable, and easily set up off camera. I take two Godox V1 flashes to every indoor session. When photographing my own family at home, I usually use at least one speed light even if it’s on-camera to catch my kids on the go.
- Natural Light: If utilizing natural light, expect to use a higher ISO. Pose your subject close to windows. If it’s mid morning or early afternoon when the sun is fairly high in the sky, place your subject perpendicular or angled slightly towards windows at 45 degrees for softer shadows. If the sun is low and streaming directly through the window, consider back-lighting. Pay attention to shadows and hotspots. They can either be distracting or skillfully harnessed to provide dramatic effect.
- Avoid Artificial Lighting: If you are looking for a clean, natural look for lifestyle images or portraits, avoid artificial lighting. Artificial lights can throw of white balance and create unnatural skin tones. This may mean turning off overhead lights and accent lights throughout the room.

What’s NOT Ideal Lighting For Indoor Photography
If your ideal indoor image has clean colors and preserves true to life skin tones, there’s a type lighting you should AVOID using! The best lighting for indoor photography is NOT the overhead and accent artificial lights already in the room.
When I enter a room I’m planning to photograph in, literally the first thing I do is walk around and turn off all of the lights. This is because artificial lights usually produce light that is not the same temperature as sunlight. This can result in strange color casts, wonky white balances, and unnatural skin tones.
This unnatural coloring is really difficult to edit out in post-production in Lightroom. It’s always my goal to get an image as close to “correct” as possible in-camera. Therefore, I avoid artificial light like the plague and turn them all off if at all possible. This even includes lights out in the hallway that may leak in through an open door.
Exceptions To the Rule
Granted, there are always exceptions to the rule, aren’t there? In my opinion, it’s always good to know the “rule” or concept as a default approach. Then part of the fun of art is intentionally breaking the rules when desired. Here are two reasons you might need to allow artificial ambient light into your photo:
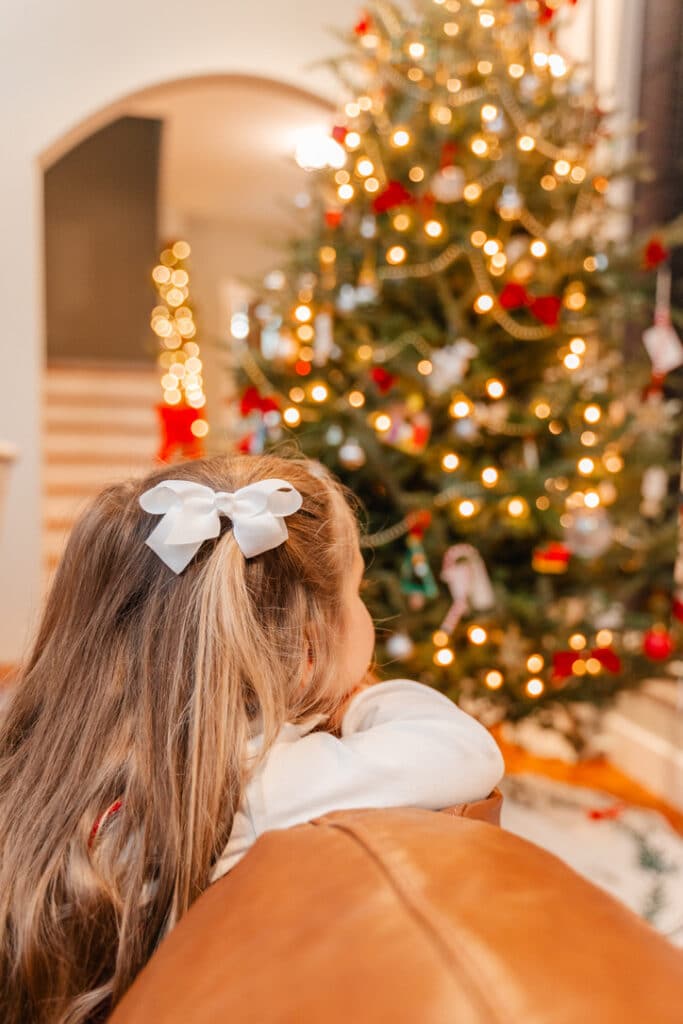
- You may consider incorporating ambient artificial light into your portrait if it contributes to the mood or atmosphere you are trying to capture in your portrait. One good example of this that quickly comes to mind is a lit Christmas tree. Around Christmastime, I always love getting portrait of my daughters with the Christmas tree glowing, and providing bokeh in the background with a wide aperture. In that case, the artificial light in the room contributes to mood of my portrait. (I do still incorporate a pop of flash in order to preserve skin tones. More on that later.)
- There may be times that you have no control of the lighting when photographing indoors and can’t use flash. My experience shooting in an operating room during a client’s cesarean section comes to mind. Photographing my family at Opryland Hotel and Union Station Hotel were other times that I had no control over the artificial light in the space. In those situations, I rely on my Expodisc to set the best possible white balance. If the artificial light is truly distracting, those images get converted to black and white. But let’s not get carried lose sight of the purpose of this post. We’re talking about the “best lighting” for indoor photography. These situations are few and far between.

1) Natural Light during Indoor Photography Sessions
When the sun is streaming through the windows, don’t you just feel your mood lift and brighten? Natural sunlight can have the same effect on your indoor photos, adding a dreamy glow to your images if you know how to harness it correctly. Using natural light is a great place to start for beginner photographers who aren’t ready to complicate their set up with supplemental lighting. All you really need is your camera and a way to meter the light!
When using natural light during indoor photography sessions, I like to use the light in different ways:
- When the sun is overhead in the middle to late morning or early to middle afternoon, I like to photograph my subjects on the same side of the house as the sun. (Sometimes at high noon you can get away with either side of the house on a really sunny day.) With the sun high in the sky, the light flowing into the windows is somewhat diffused. This is because it is directly hitting the roof or side of the house rather than streaming directly in. At this time of day, when the window is still shaded, you can take advantage of the even light by placing your subject perpendicular to the window.
- You can also try angling them towards the window (facing the window). If the room is small or full of light, neutral surfaces that can reflect the light, you can even venture away from the window. Reflectors can also come in handy when trying to bounce light. When facing the window, just keep an eye out for hotspots of light or weird shadows (unless you’re into that).
- When the sun is pouring through the window, in the hours after sunrise and and before sunset, back-lighting is another great option for natural light. You’ll want to place your subjects back to the window. Make sure the image is exposed for the subject rather than to sunny window. (I like to use the Expodisc to meter for a correct exposure. If you’re still learning manual mode, check out my beginner photography course!)
The Downside of Natural Light for Indoor Photography
While I love using natural light, there are some downsides. Some of these complicating factors are what drove me to learn how to use flash. They also have resulted in me incorporating supplemental lighting in all of my paid indoor client work.
- If the room you are using for your indoor photography does not have large enough windows you may have to use a high ISO. High ISO settings can lead to increased grain or digital distortion in your images. Thankfully, there are now programs like Topaz Lab that can help correct and smooth your grainy images in post production. However, this does result in increased editing time. If the ISO is really high the images may not be usable. Because I provide photography products like albums and wall art to my clients, I’m also very concerned about maintaining good clarity for the (potentially large) images I will be printing.
- The weather can spoil your plans for shooting indoors when using only natural light. If you’ve followed much of my flash photography education, you know that I live on a mountain that is often covered in dense fog. If I was solely relying on natural light, I would have to reschedule my indoor session along with my outdoor session on bad weather days. What a pain! I don’t have extra room for stressful logistics in my life right now. If you live in California or somewhere that is consistently sunny, maybe natural light indoor photography is just right for you!
- I also don’t like being stuck next to windows. When photographing using natural light, you have to go where the good light is. This is, of course, also true of outdoor photography. However, when outside you usually have a variety of options no matter the time of day. When photographing with in the confines or a home, you may only have a few usable spots.
2. In My Humble Opinion, The Best Lighting for Indoor Photography Is Flash
As mentioned above, after getting burned one too many times by not having enough natural light, I finally decided to learn how to use flash. (I cringe when I think back on some of my early sessions. There were even a couple I literally had to reshoot because the images were unsalvageable.) Even if I don’t use end up using them, I always arrive at paid photography sessions with at least two speed lights in my camera bag just in case. You can take a peek inside my camera bag to see my gear in this post.
I particularly like my speed lights, two of which are Godox V1‘s, because they are battery operated and compact for easy portability. Two speed lights are usually enough to fill normal sized rooms with enough light. I do own a third Godox V860iiI for the rare occasions that I’m in a larger space that requires more light. Some photographers prefer strobes, which are larger and more powerful. In my opinion, these are great for studio settings and less ideal for on-location indoor shoots.
I believe a mixture of natural light and flash to be the best lighting for indoor photography for a couple of reasons:
- With flash, you can create your own light! If you opt for off camera flash, you can decide exactly where to place your light for the most flattering effect. Because you are creating and arranging your own light, you are no longer glued to the window. With the right setup, you can photograph any part of the room!
- When mastering flash, you outdoor work and indoor work will look more consistent. I used to get so frustrated by how shadowy and dull my indoor work looked in comparison to my outdoor golden hour work. My outdoor images popped off the page. I felt like my indoor images fell flat. After learning how to craft my own light, skin tones looked beautiful no matter the setting!
- With flash, you can usually get away with a lower ISO. This results in smoother, sharper looking images that are ready to print after less editing.
- I no longer fear the weather! Obsessing over the weather during indoor session days is a thing of the past knowing I can create supplemental lighting with flash.

Not Sure How to Get Started with Flash Photography?
So obviously, my pick for best lighting for indoor photography is using a mixture of natural light and flash. But what if you’ve never tried flash and aren’t sure how to get started? I remember feeling that way! Where was I supposed to point it? Why was flash power denoted by fractions? Should I use on-camera or off-camera flash? How do I make it look natural instead of “flashy”? Learning something new, that you can only see for a split second can be a little intimidating! It certainly takes a lot of practice to get it right. However, the reward for learning how to create your own light is huge!
If you’re looking for a “flash friend”, I’m here to help:
- I’ve written several blog posts on the topic that you can find in this category on my blog.
- My In-Home Flash Photography Course teaches my entire approach to using flash for my indoor newborn and family sessions. (But it’s also the set up I use for branding and other lifestyle sessions.)
- If studio-style portraits are more your speed, check out my Heirloom Photography Course.

Conclusion
No matter whether you decide to stick with natural light or dive into flash, learning how to photograph indoors is a worthy endeavor. This is true even if your simply want to capture more memories of your family around the house! I hope you have found this post helpful and will try out some of my tips. Let me know how it goes in the comment section below or find me on social media!
Related Post: At Home Rainbow Photoshoot BTS
Leave a Reply