How to Edit Out Someone In A Photo
Bummer. You captured the perfect shot right when someone walked into the background of your frame. Can it be fixed? In this post, photographer Kelley Hoagland will show you how to edit out someone in a photo using Photoshop. There are actually a few simple techniques you can try!

This post contains affiliate links. This means this website may receive compensation if a purchase is made through the link at no extra cost to you.
It may be helpful to note that I usually complete the bulk of my photography edits in Lightroom. That’s where I crop, adjust exposure, color grade, and do light touch ups. However, when a more complex edit is needed, I open the image in photoshop. This can be easily accomplished by clicking ⌘ + e (or ctrl + e) on my Macbook keyboard. Likewise, from the home bar you can select photo > edit in > edit in Adobe Photoshop 2024.
Whenever editing a photo in Adobe Photoshop, I immediately click ⌘ + j (or ctrl + j) to duplicate the image to the top layer. I never edit directly on the original image in order to avoid damaging it. Whether I state it or not, duplicating the original image is always my first step! I like to think of working on an image in Photoshop like I’m working on a a paper collage because you work in layers. We want to keep the original base layer protected by copying it. From there we are free to cut out, paint, and paste on top of the image.
How To Edit Out Someone In A Photo Using the Healing Tool
Let’s first talk about how to edit out someone in a photo in Photoshop using the Spot Healing Tool. This is a great option if the person is taking up a very small part of the background and isn’t really overlapping with your subject. It’s similar to the Erase Tool in Lightroom, but I find it tends to be more precise. (Sometimes the Erase Tool and Healing Tool in Lightroom tend to leave smudges or distortions behind from my experience.)
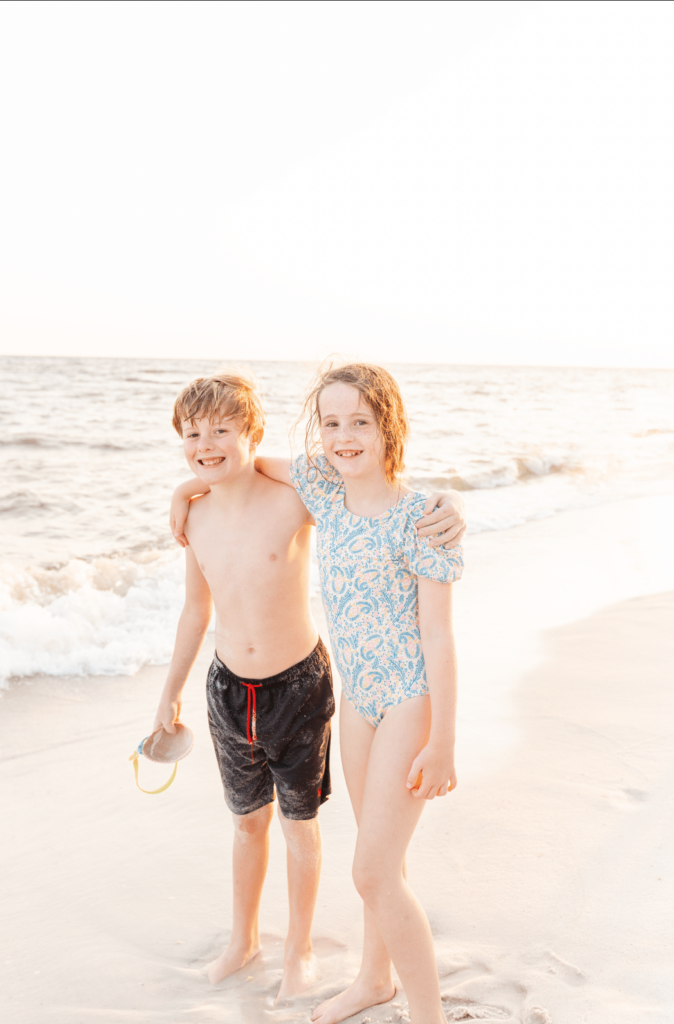
Let’s go through this example image from the beach. The beach is one of my favorite places to photograph my family, but there are often people in the background, especially at busy times like sunset when the light is beautiful.

- In Lightroom, click ⌘ + e to open your image in Photoshop.
- Click ⌘ + j to create a copied layer of the background, original image.
- Select the Spot Healing Tool.

- Click and drag the Spot Healing Tool over the entire surface of the people you would like to remove from the image. To make the Spot Healing Tool brush larger or smaller, use the bracket keys on your keyboard (“[ and ]”).

- When you release your mouse, Photoshop will decide how to remove what you’ve drawn over. It’s usually very accurate when removing small objects/people.
- To save the image back to Lightroom for continued editing or exporting, click ⌘ + s.
Using the Lasso Tool To Edit Out Someone in the Background
When the extra person in the background of an image is closer to the camera and therefore larger, I like to use the Lasso Tool. Rather than painting over the person, with the lasso tool, you draw a circle around the person you would like to edit out.
Let’s go through another example from the beach. My little friend is a total mood in this image. My youngest daughter happened to be playing in the background. While I could certainly leave her in the image, I think removing her helps keep the focus on this little man enjoying his snack.

- In Lightroom, click ⌘ + e to open your image in Photoshop.
- Click ⌘ + j to create a copied layer of the background, original image.
- Select the Lasso Tool.
- Draw around the person you would like to edit out of the background.

- Right click inside of the to selected area and click “Fill”.
- Make sure “Content Aware” is selected in the drop down menu. The click “OK”. Photoshop will not cover up the person.


- To save the image back to Lightroom for continued editing or exporting, click ⌘ + s.

How To Edit Out Someone In A Photo When They Overlap With Your Subject
Granted, I realize that the above two examples are pretty easy edits. The people in the background down’t overlap with my subject and are on fairy clean backgrounds. What do you do if the person you are trying to delete overlaps your subject? What if the background is more complex?
In that case, I would recommend doing a combination of creating a layer that is just your subject and using the Clone Stamp Tool to erase the extraneous person from the layer below. Let’s take a look at this image I took of my daughters at the Opryland Hotel. If you have little kids, you know you have to move quickly to get a good photo. I had just gotten everyone into position when some people rounded the corner of the walkway I had them posed on. I snapped several photos quickly, trying to angle myself to block the strangers behind my daughters. But of course this image with a person in the background was the image where they had the best smiles. Doesn’t it always happen that way?

- In Lightroom, click ⌘ + e to open your image in Photoshop.
- Click ⌘ + j to create a copied layer of the background, original image.
- Select the Select Tool. With the Select Tool clicked, look for “Select Subject” on the top toolbar.


- With your subject selected, click ⌘ + c to “copy”. Then click ⌘ + v to “paste”. This will create a new top layer that is only your subject.

- Now select “Layer 1” to edit in. This way “Layer 2”, which contains the subjects, will be unaltered.
- With Layer 2 selected, click the Clone Stamp Tool.

- The Clone Stamp Tool paints pixels from another part of the image. To select where you would like to borrow or copy part of the image for painting, click “option” on the keyboard and then click the area you would like to copy. Then move the tool to the area you would like to paint over. Watch me complete this action in the video clip below. I choose part of the wall above to copy and paint over the man. Because I’m working on Layer 1, the “paint” does not cover my subjects on the top layer, Layer 2.
- To save the image back to Lightroom for continued editing or exporting, click ⌘ + s.

Now It’s Your Turn!
I hope you found this post about how to edit someone out of a photo in Photoshop helpful! These are the main three approaches I use to remove distractions from the background. Depending on the situation, sometimes I’ll use a combination of all of the listed tools.
Let me know about your progress! Feel free to drop a comment in the box below or contact me through my website!

Looking for more photography editing tips? Check out my post on How to Fix a Blurry Photo!
How to Make a Photo Less Grainy.
Leave a Reply