What Are Stops in Photography
Have you heard photographers throwing around terms like “1 full stop” or “2 full stops”? Are you wondering, “what are stops in photography?” Today’s post is going to dive right into photography stops and how they are useful to know when dialing in, and changing settings for exposure!
I’ll be honest, when I first heard about full stops in photography, my eyes kind of glazed over. Too many numbers! It wasn’t until I started shooting with old film cameras that only function in full stops and using the Sunny 16 Rule that I finally understood how helpful and simple this information can be. My goal is to break it down for you in way that’s totally understandable!
This Post May Contain Affiliate Links


What Are Stops in Photography
In the most basic of terms, “stops” are used to refer to an increase or decrease in the exposure of your image. Or put even more simply, a stop is a unit of measure referring to the amount of light entering your camera. Increasing the light by 1 full stop doubles the amount of light entering your camera. Decreasing the light by 1 stop, cuts in half the amount of light entering your camera. Huh?
A Three Way Balancing Act
Confused? Let’s back up for a second. As explained in this post about the exposure triangle, getting the correct exposure is a three way balancing act. The photographer must control the light through the camera settings of aperture, shutter speed, and ISO. If you change one setting in a way that increased exposure, one of the other two settings must change to decrease exposure in order to maintain a balance exposure, and vice versa.
Let’s say a photographer increases their aperture by 1 stop to have a more shallow depth of field. In order to maintain a balance exposure, the photographer will need to decrease either their shutter speed or ISO by 1 stop.
Aperture and Full Stops
Things can get a little confusing because aperture is measured by the f-number or “f-stop”. That is not exactly the same thing as a “full stop” in photography. (There are full stops in ISO and Shutter Speed too.) As a review, aperture refers to how wide the hole in your lens is. A wide or large aperture lets in more light and also results in a narrower depth of field. A narrow or small aperture lets in less light, but results in a wider depth of field.
Full stops in aperture are: f1.4, f2.0, f4.0, f5.6, f8.0, f11, f16, f22.
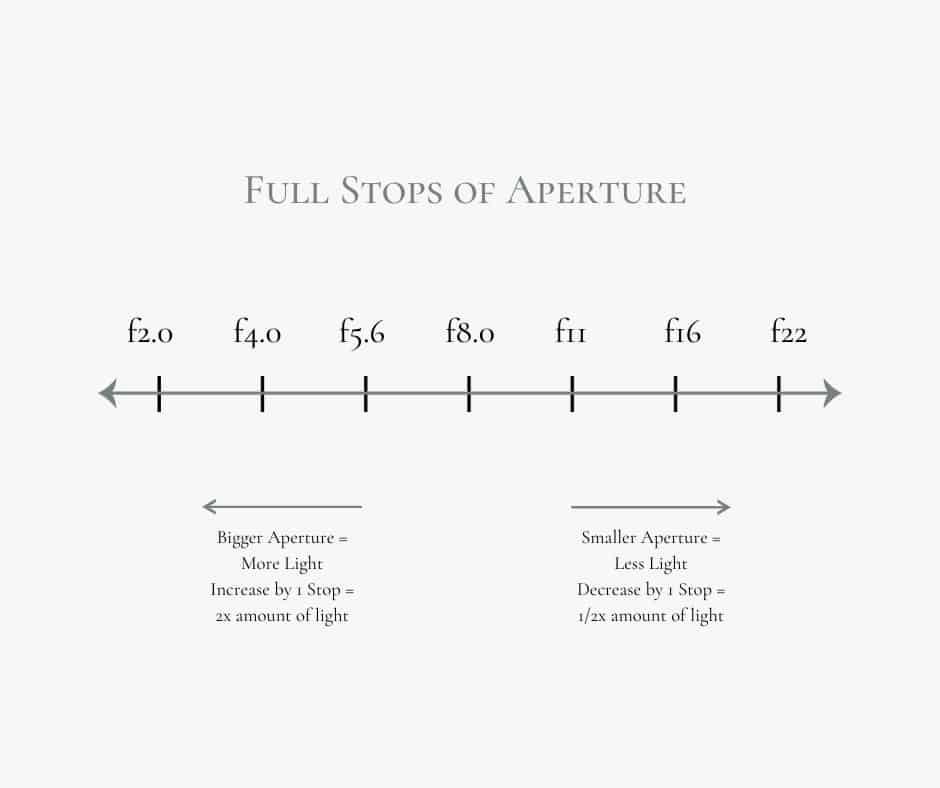
If a photographer changes the aperture from f2.0 to f4.0, that’s decreasing the light by 1 stop or cutting the light in half. Changing the aperture from f5.6 to f4.0 increases the light by 1 stop, doubling the amount of light. Moving from f8.0 to f4.0 increases the light by 2 stops. This doubles the light and then doubles it again!
Shutter Speed and Stops
As mentioned above, shutter speed also has full stops. To review, shutter speed controls how quickly the shutter of your camera opens and closes, allowing light to hit the sensor or film. A slower shutter speed allows in more light, but does less to stop movement. A faster shutter speeds lets in less light, but more effectively freezes movement.
Full stops of shutter speed are: 1/60, 1/125, 1/250, 1/500, 1/1000, 1/2000, 1/4000.
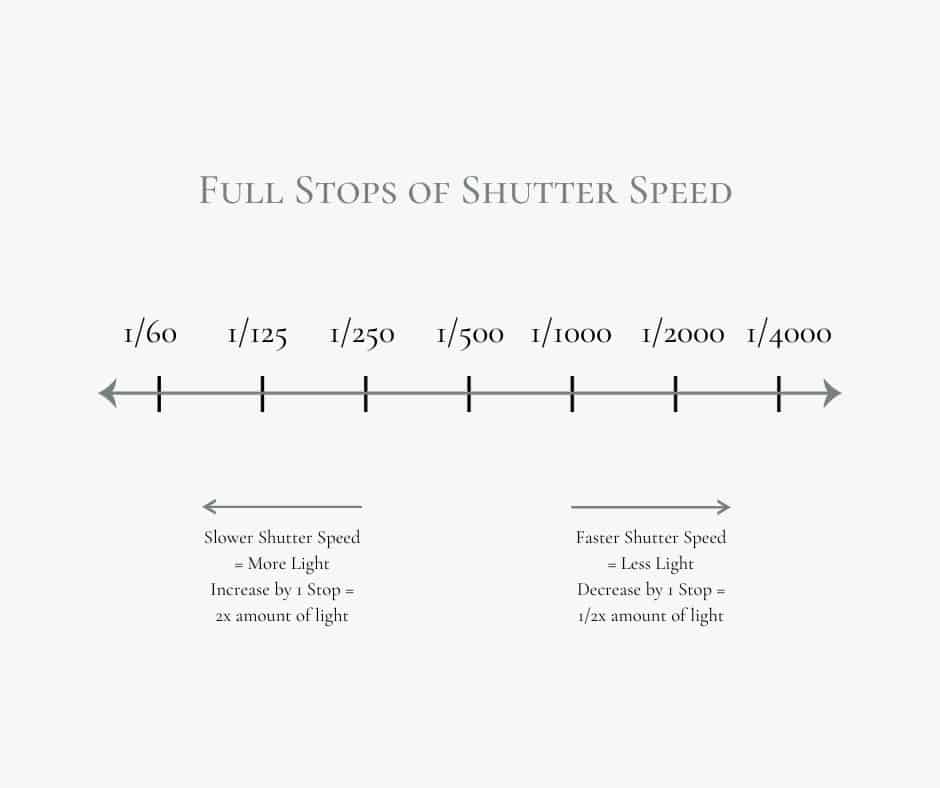
If a photographer changes the shutter speed from 1/125 to 1/250, that decreases the light by 1 stop or cuts it in half. Likewise, if the photographer changes the shutter speed from 1/1000 to 1/500, that increases the light by 1 stop or doubles the amount of light. Adjusting the shutter speed from 1/500 to 1/125 increases the light by 2 stops.
ISO and Full Stops
We can’t leave out ISO! ISO has full stops, just like aperture and shutter speed! To review, in digital photography, ISO controls how sensitive the camera’s sensor is to light. In film photography, the ISO is dictated by the film stock. A lower ISO number is less sensitive to light and creates a clearer image. A higher ISO number is more sensitive to light, but increases the noise or grain in an image.
The full stops of ISO are: 100, 200, 400, 800, 1600, 3200, 6400.
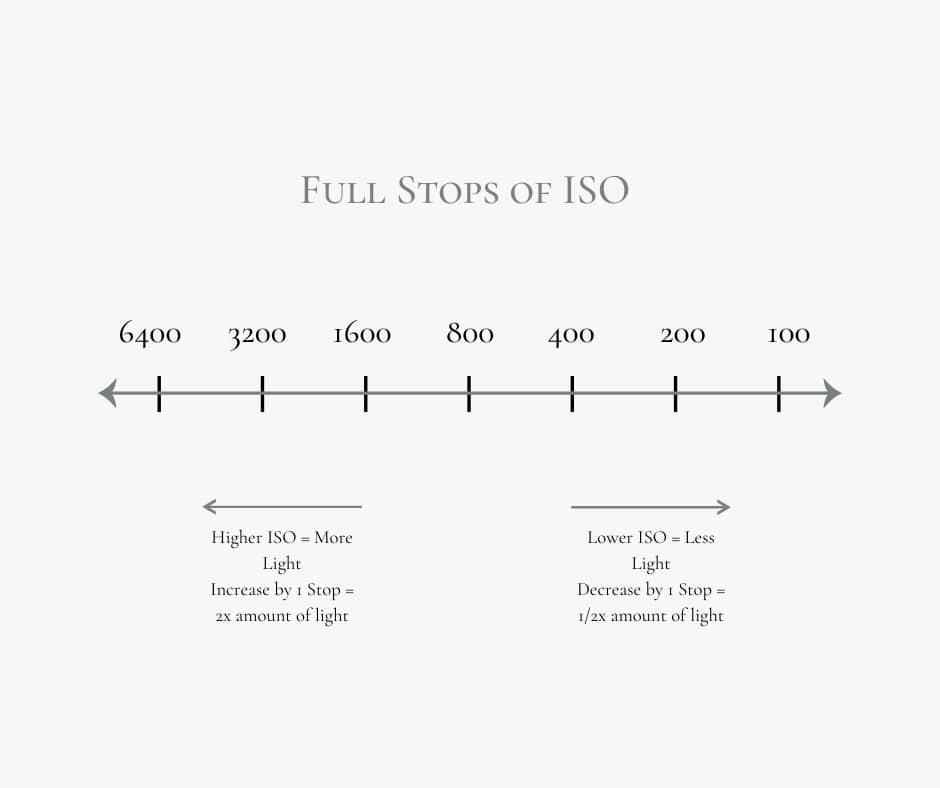
If a photographer changes the ISO from 400 to 200, that’s decreasing the light by 1 stop or cutting the light in half. Changing the ISO from 400 to 800 increases the light by 1 stop, doubling the amount of light. Moving from ISO200 to ISO800 increases the light by 2 stops. This doubles the light and then doubles it again!
Full Stops vs Partial Stops
If you primarily use a digital camera, you may be thinking, “My camera has way more settings than these full stops!” And you’re correct! Most modern digital cameras offer partial stops. These are small adjustments which allow for more fine tuning of your settings. (My Sony a7iv offers settings in 1/3 stops.)
Honestly, this is why I initially didn’t bother to learn the full stops. Why bother limiting myself to only those settings? I’m honestly still not a purist when it comes to exposure settings, but I do think this concept can be helpful when working to understand exposure.
What Are Stops In Photography- How to Use Them!
Now that I’ve hopefully answered the question; what are stops in photography; let’s talk about how to use them!
When Changing Settings
I personally think that understanding stops in photography comes in most handy when changing settings in the same light. It can keep you from re-metering the light over and over again.
Let’s say you are photographing your family in the shade. You are starting with individual portraits of the kids, so one subject at a time.
You’re starting with the settings f2.0, 1/500 ISO 400
Once you’ve finished photographing the children individually, you want to get a picture of the whole family of 5 people. You want to make sure everyone will be in focus and know that choosing an aperture f5.6 would be a safe bet. Changing from an aperture of f2.0 to f5.6 would decrease the light by 2 stops. In order to maintain the same exposure you could increase the ISO 2 stops, slow the Shutter Speed by 2 stops, OR increase the ISO 1 stop and slow the Shutter Speed by 1 stop. See how it’s all about balancing out the settings? Here would be your options in full stops:
- f5.6, 1/125, ISO 400
- f5.6, 1/500, ISO 1600
- f5.6, 1/250, ISO 800
All three of the above settings would create an exposure equal to the original exposure with f2.0. However, always remember that decreasing the shutter speed decreases your camera’s ability to capture movement. Increasing the ISO increases the noise/grain. Your choices in camera settings need to be informed by the second factors that each component of the exposure triangle control.
When Using the Sunny 16 Rule
You can read all about the Sunny 16 Rule here. In a nutshell, it’s a great way to estimate exposure based on daylight conditions. When using this rule, aperture settings are adjusted based on the amount of daylight using full stops.
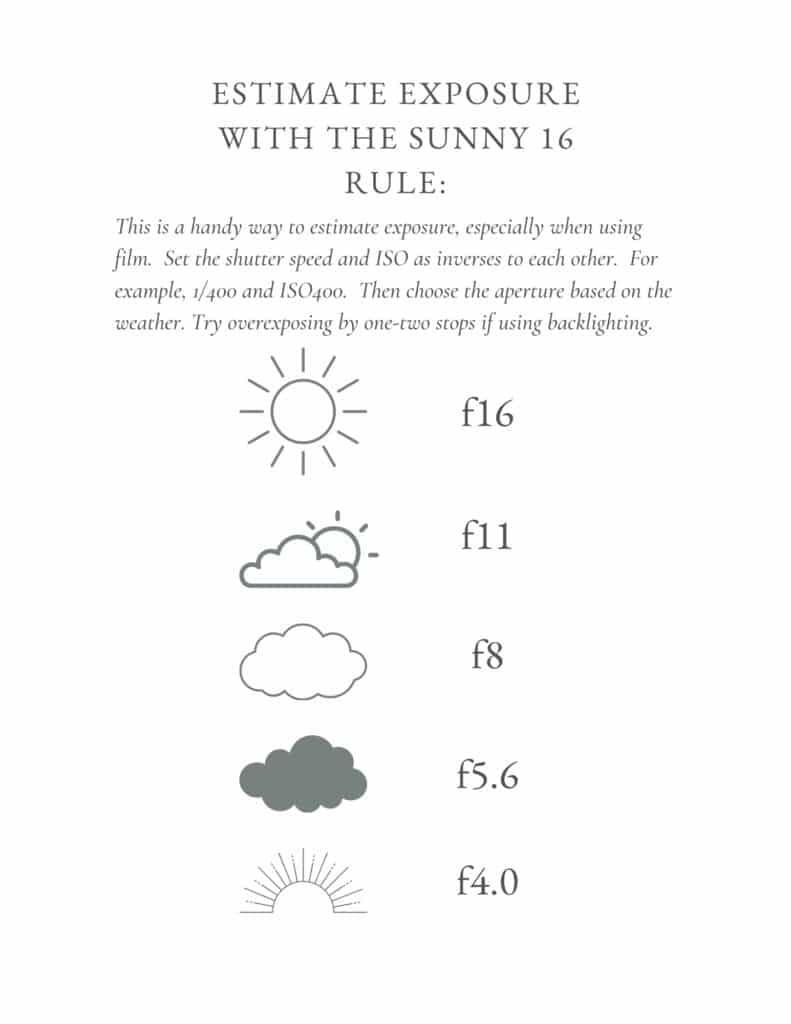
Understanding the full stops of shutter speed and ISO allow you to adapt the Sunny 16 rule to your creative purposes. Let’s say it’s an overcast day. Per the rule, you should use an aperture of f8. Let’s say your shutter speed is set to 1/250 and therefore your ISO is 200. However, you want to use a wider aperture of f4 for a narrower depth of field to make your subject pop against the background. Moving from f8 to f4 increases the light by 2 stops. To return to a balanced exposure, you will need to either decrease the ISO by 2 stops, speed up your shutter speed by 2 stops, or decrease the ISO by 1 stop and slow the shutter speed by 1 stop. Here are your options:
- f4, 1/250, ISO50
- f4, 1/1000, ISO200
- f4, 1/500, ISO100
In Conclusion – What Are Stops in Photography
I hope this post has better helped you understand the answer to: “What are stops in photography?” I’ll be 100% honest, I’m not a purest when it comes to camera settings. One of my favorite lens has a widest aperture of f2.8 and I use that setting all the time. I throw in 1/3 stops all over the place. However, I do still believe that understand what stops are in photography is foundational knowledge that will serve you well as you choose and adjust camera settings.
Are you looking for more info about beginner’s photography? Take a look around the blog and don’t hesitate to reach out!
Related Post: How To Fix Blurry Photos
