How to Take Heirloom Portraits
Are you a professional photographer considering expanding your offerings and wondering how to take Heirloom Portraits? Then you have come to the right place! In this post I will discuss the benefits of adding heirloom portraits to your offerings and the basic equipment you will need to take these classic portraits.
What are Heirloom Portraits?
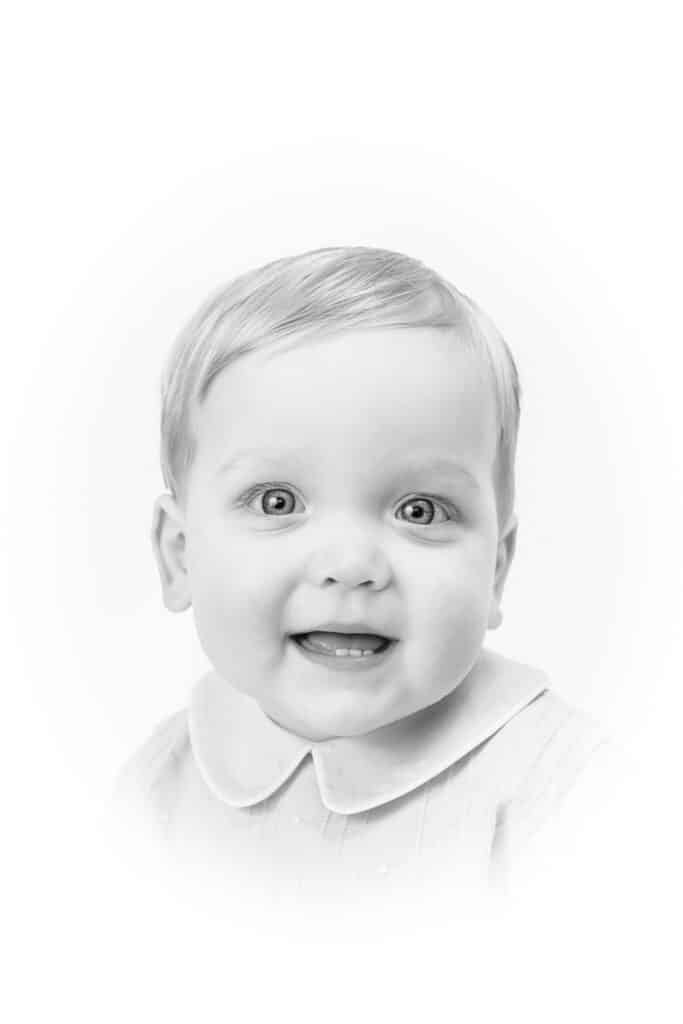
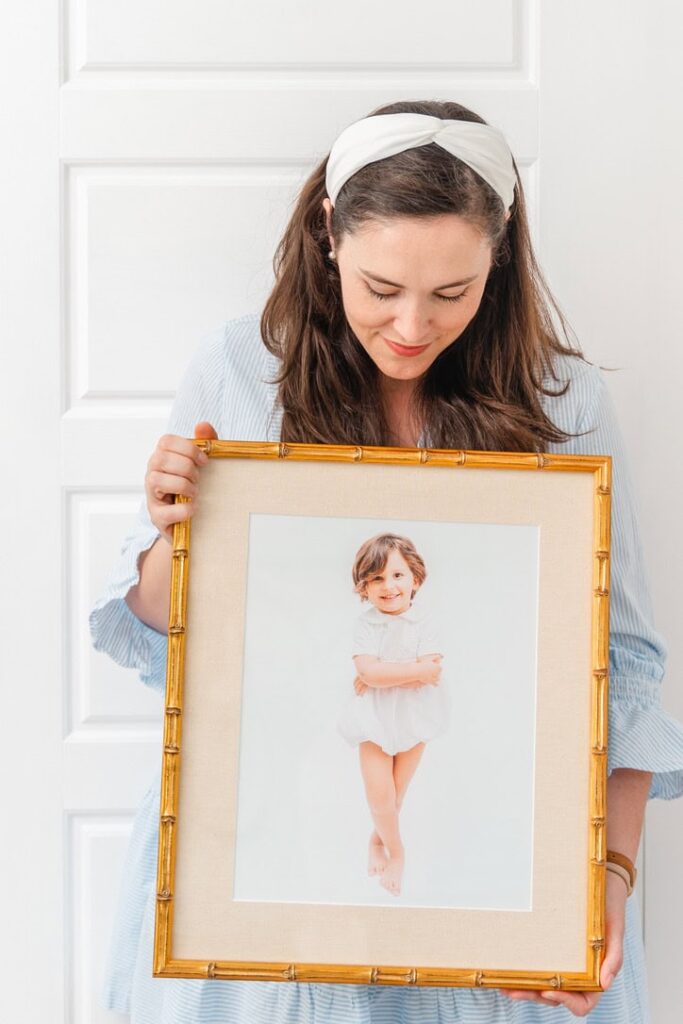
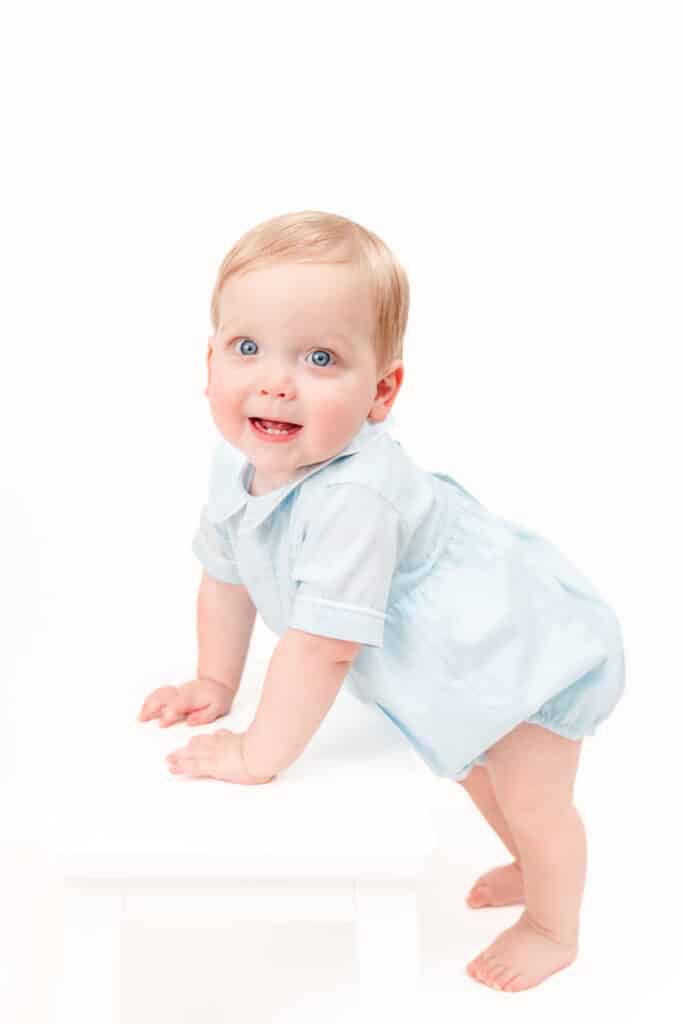
Before I discuss how to take heirloom portraits, let’s first just take a moment to discuss what heirloom portraits even are. “Heirloom photography” refers to a timeless style of children’s portraits that has returned to popularity in recent years. The subject is usually a child under the age of 5-years-old. He or she dresses classically fro the session; wearing peter pan collared tops, “page boy” sets, ornately smocked dresses or lace embroidered gowns. These portraits typically feature the subject in front of a simple white background. Headshots of the child are the most common offering. Some heirloom photographers, like myself, also offer full body portraits. These serve as a great opportunity to feature antique children’s furniture that is special to the family. The photographer creates images in color or black and white.
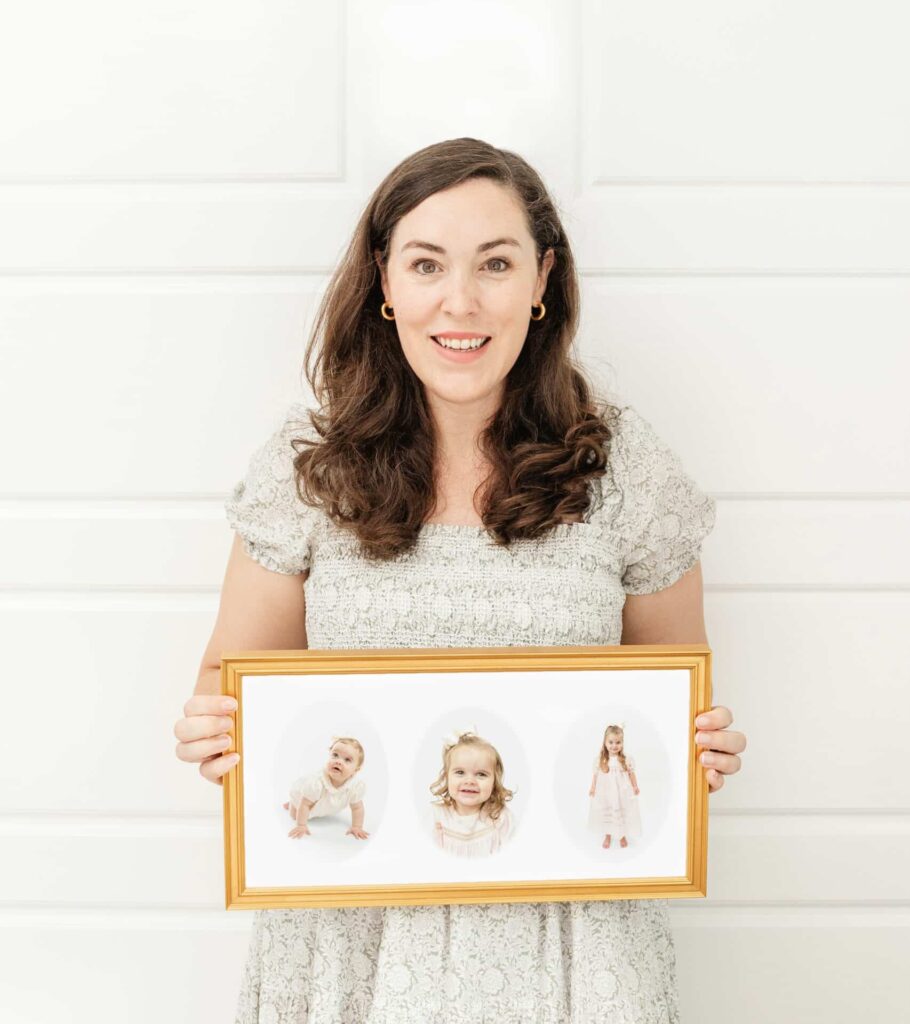
Vignetting is another feature of heirloom photography that sets it apart from other modern styles. Photographers add a vignette, or “frame” to these portraits. This usually occurs in the form of a blurred oval. The effect draws the viewer’s eye directly to the subject. The vignette also adds a vintage feel to these portraits. Oval portrait frames were very popular in 18th century France and into the Victorian Period when photography became commercially available. Early victorian photographic portraits were often mounted in oval mats. As technology progressed and photographs began to be printed on paper, photographers would add an artistic oval blur. This technique remained popular into the first half of the 20th century. Today’s heirloom photographers now create this look in photoshop, inspiring a sense of nostalgia.

Why Should You Consider Adding This Style Of Portrait To Your Offerings?
While heirloom photography received a recent surge in popularity, with many family photographers offering these portraits as cheap mini-sessions, there actually exists a rather stable demand for this type of work. Multiple customers have inquired with me because they want to re-create the style of portrait that was taken of themselves as a children. I recently started working with a grandmother who wanted to re-create the style of composite portrait she has of her daughters for her baby grandson. Especially in the southern United States, there still exists a strong tradition behind this style of portrait. When families have multiple children, they will return to document each one.
If you have never sold framed artwork, learning how to take heirloom portraits serves as a great way to explore this new stream of revenue for your business. Heirloom portraits are meant to be printed, framed and hung on the walls or displayed on end tables. The process is not truly finished without this final step. Also, consider that heirloom photography exists as a specialty offering. The equipment and additional editing required increases its value.
Sure, your client could take your digital files and print the images themselves. However, I have seen this play out time and time again. The final step of actually printing, framing, and hanging photographs falls to the bottom of the to-do list. I’m guilty of putting off this task myself! Why not offer to take care of this final step for your clients, helping them ensure that their images are printed and framed professionally? Heirloom portraits center on a theme of legacy. Shouldn’t we ensure that these images are correctly preserved for generations to come?
Please do not take this information and use it to offer cheap mini-sessions. I would argue that you are selling yourself and your clients short, as well as lowering compensation expectations of our industry as a whole.
How To Take Heirloom Portraits
Only so much information can be covered within the confines of a blog post. Therefore, I will mainly focus this section of sharing the equipment utilized to create these portraits. I am considering creating a course that goes through my Heirloom Photography process from start to finish. Spoiler alert, I don’t actually have a photography studio. Would you be interested in learning more and getting on a waitlist? Contact me here.
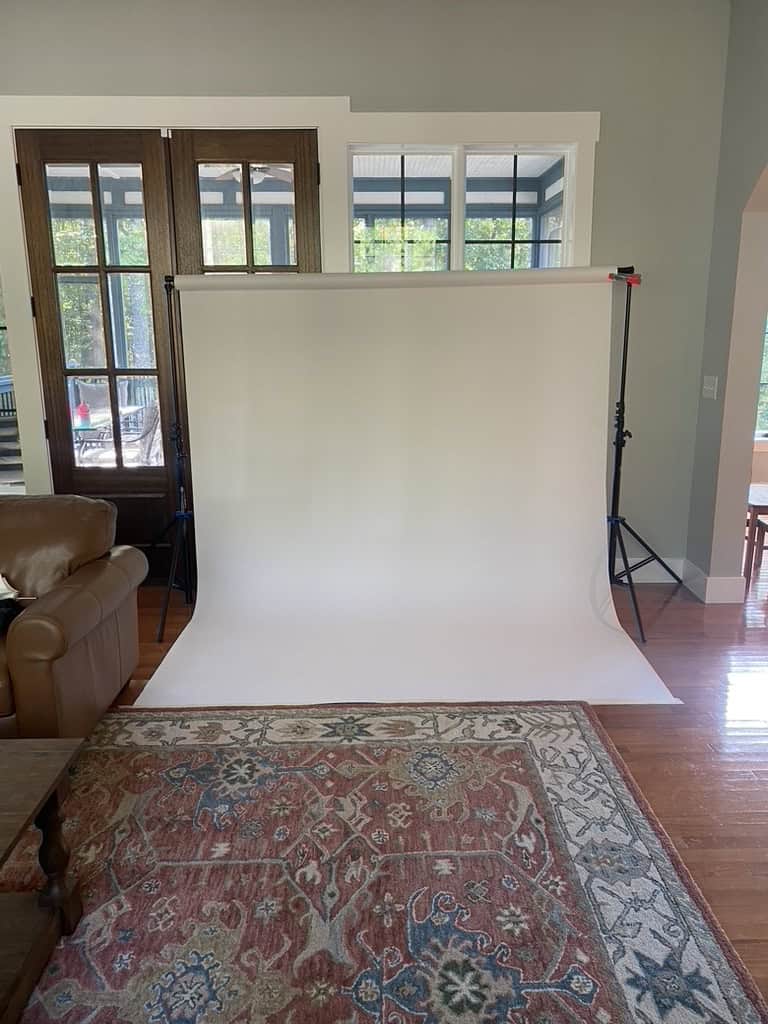
1) A White Backdrop
When beginning the process of taking studio style portraits, you require a backdrop. I personally love to use Savage Seamless Paper in Pure White. I have ordered it in a variety of sizes. The 53 inch wide paper is great if you plan to photograph one child at a time and anticipate that the child will sit or stand still. When my plan includes photographing an older infant who can crawl, a young toddler who is active, or multiple children together, I opt for the 86 inch wide paper. It provides a larger “target”, allowing for the little one to move while remaining on the backdrop for a longer period of time.
Don’t forget to also purchase a stand for your seamless paper. I have used this one by Savage with minimal issues for several years. (I say minimal issues because a few of the screws have stripped over time, but the stand is still stable and fully functional.) The seamless paper slides onto the center support and can be adjusted to varying heights. I also recommend having some clamps handy to secure the paper once you’ve unrolled your desired amount. Otherwise, the paper may continue to unroll causing a mess of wrinkled paper. I use wide masking tape or painters tape to secure the edges of the paper to my hardwood floors.
2) A Place to Sit
As I mentioned earlier in this article about how to take heirloom portraits, some families I work with opt to bring antique furniture to their session. I find it helpful to keep a small white footstool handy whether the family brings their own furniture or not. Sometimes little kids will sit still and calm their bodies more easily when given a small place to sit. (Having them sit directly on the floor may open up the gateway from crawling, flopping, etc.) The stool I currently use is no longer available for purchase, but this one has a similarly low profile. It blends in well with the white background and can be easily covered by a gown’s skirt or simply cropped or mostly edited out.
3) Lighting
The natural light photographers will likely not love this addition to the list. You can certainly take heirloom portraits using natural light if you have access to a studio or a well lit room. I often set up these portrait sessions in my own living room or at clients’ houses. While my living room actually features huge, wonderful windows, I live on top of a mountain that is prone to fog many months out of the year. I personally don’t rely on natural light because I don’t want to be forced to watch the weather for my indoor sessions as well as my outdoor sessions.
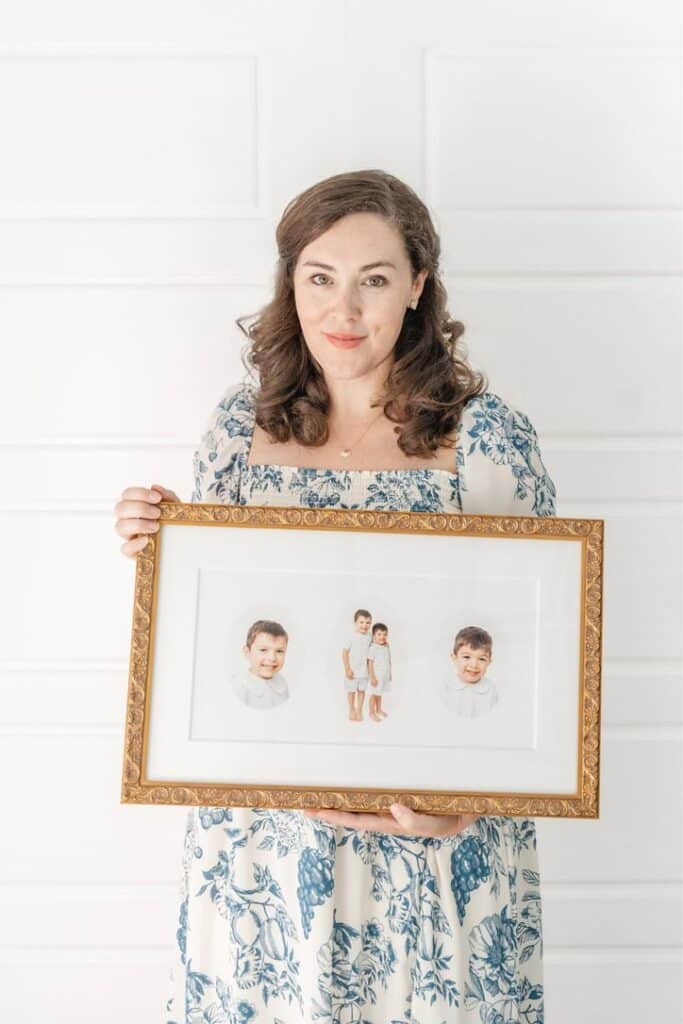
Another reason why I strongly recommend the use of artificial light is due to my experience of many families hiring me to create heirloom composites. Composite wall art is created by combining multiple portraits (usually 3 or 5) into one piece of art. Recently, one client asked me to combine images of her child at 1 year, 2 years, and 3 years old. When I photographed the first two portraits, the mother didn’t share her intentions. I didn’t stress too much when she shared her plan because I had been using consistent lighting all along. The portraits, taken over the course of 3 years, were beautifully consistent!
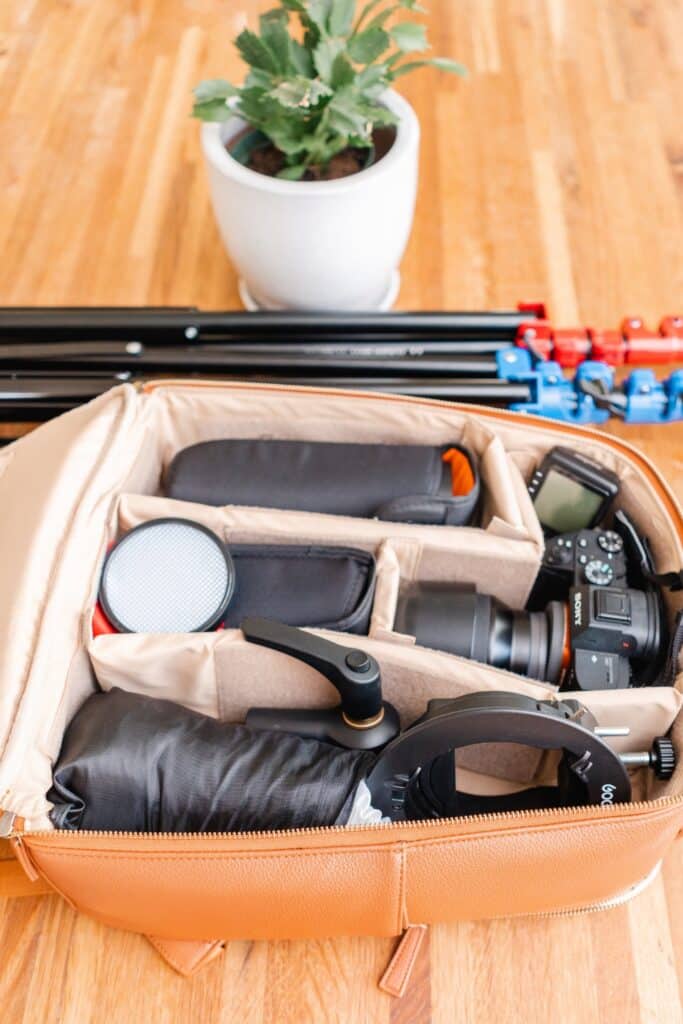
Want to know what artificial lighting equipment I use when taking heirloom photos? You can find the entire gear list here. I typically set up two flashes for these portraits, one diffused by an umbrella and one bounced. Would you be interested in learning my process for using flash during indoor and studio style sessions? I actually already have a full course for that! The technique I use in this course is the same general approach that I use for lighting my heirloom photography sessions. If you haven’t already mastered using your camera in manual mode, I recommend getting comfortable with that first before adding flash photography to your skillset.
4) Editing Software
I’m assuming I’m writing this article to photographers who are already taking portraits outdoors or in home. You are likely already using Lightroom to make adjustments to your images. I personally use Lightroom for cropping and adjusting the brightness and colors of my heirloom images. However, if you are interested in learning how to take heirloom portraits, it’s time to get a little more comfortable with Photoshop. I use Photoshop to complete detailed edits (i.e. smooth scratches, drool, and buggers and remove fly away hairs). This program allows me to create vignettes and compile multiple portraits into composite wall art. I am no Photoshop expert, but learning how to use a few simple tools can take you a long way!
Interested in learning how to take heirloom portraits form me?
Heirloom photography sessions have become one of my favorite and more profitable offerings. I love that I can schedule them during the day with little concern about the weather. By emphasizing wall art, I can provide a fully finished product to my clients. Opening deliveries of new wall art feel like Christmas morning to me and these aren’t even my kids! If you find the right framer, the results are stunning and the process doesn’t have to be difficult.
If you’re interested in learning how to take heirloom portraits from me, a photographer who doesn’t even have a studio, let’s chat! I’m in the process of compiling this information into organized, easy to follow steps that will have you up and running in no time.